Mastering the technique of making this genuine Australian damper bread recipe will transport you to the very heart of Australia’s outback culinary traditions. This basic but delicious bread has been around since the country’s pioneer days, and it’s known for its modest ingredients and adaptability. To help you make this iconic Australian favorite in your own home, we’ll walk you through each stage of the cooking procedure, except the list of ingredients.
A big mixing bowl, a wooden spoon or silicone spatula, a measuring cup, a spotless work surface, a baking sheet, and parchment paper or a silicone baking mat are the first things you’ll need to get started on the Australian damper bread recipe.
Mixing the dry ingredients together in a big bowl is the first step in making the genuine Australian Damper Bread recipe. This bread is traditionally baked using self-raising flour, although all-purpose flour and a leavening agent may be used instead. Sprinkle a little salt over the dry ingredients and stir to distribute it evenly.
The next step is to combine the dry ingredients with the grease. Rub the fat of your choice (butter, margarine, or even lard) into the flour with your fingers after cutting it into little cubes or bits. To get a breadcrumb-like texture, rub the lard into the flour until it resembles coarse meal.
When the consistency is right, make a well in the middle of the flour and set aside. Add a liquid ingredient, such water or milk, gradually while stirring with a wooden spoon or silicone spatula until a soft, somewhat sticky dough develops. Do not overwork the dough, since this might cause the bread to be harsh and thick.
Want more ideas to round-out your Australian Recipe Box?
A lot of great options are in these posts!
- 30 Unique Australian Foods You Have to Try
- 25 Easy Australian Food Traditions to Try At Home
- The 12 Best Australian Chicken Recipes
- 33 Traditional Australian Food Recipes (Updated 2022)
Place the dough on a lightly floured surface and knead it gently for a minute or two, just until it is smooth and malleable. Make a circular, flat loaf about 2 inches (5 cm) thick from the dough. If you’d rather have individual rolls, just cut the dough into smaller pieces.
Place the loaf on a baking sheet lined with parchment paper or a silicone baking mat, and score the top of the loaf with a cross or other design using a sharp knife. The bread will rise more evenly and look more attractive thanks to the scoring.
The Australian damper bread recipe is ready when it has a solid crust and a golden color when baked in a preheated oven. The size and thickness of your loaf will determine how long it needs to bake. After the Damper Bread has finished baking, take it out of the oven and place it on a wire rack to cool for a few minutes.
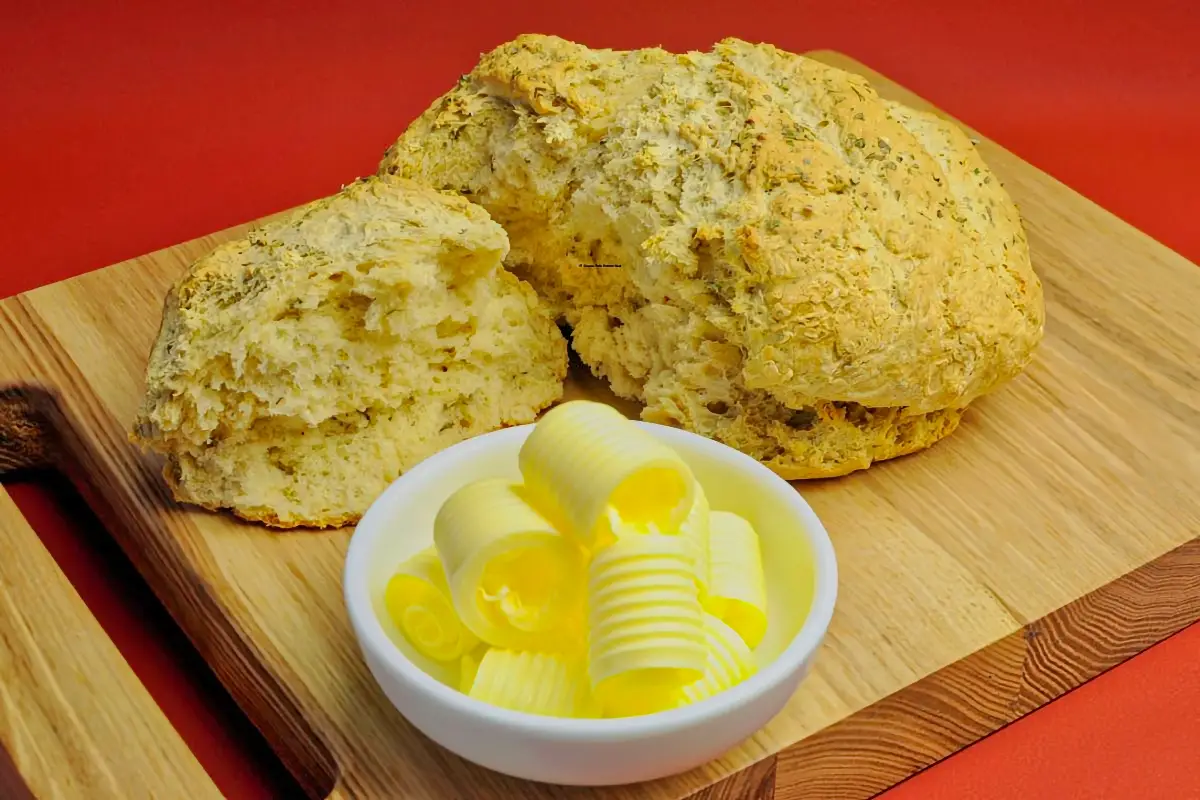
The warm Australian damper bread recipe is delicious on its own or slathered with butter, jam, or any other spread. Because of its adaptability, this bread is a fan favorite in Australia, where it is used to satisfy both sweet and savory desires.
This comprehensive tutorial will teach you how to make a Australian damper bread recipe from scratch, giving you and your loved ones a taste of the outback without leaving home. Enjoy your baking!
The Complete Recipe with Ingredients and Step by Step Instructions is Listed Below
3 Reasons People Love the Australian Damper Bread Recipe
1. Traditional Recipe: The Australian Damper Bread recipe has a rich history that dates back to the colonial era of Australia. It was originally made by swagmen, drovers, and other travelers who needed a simple, filling bread that could be cooked over a campfire. This recipe has been passed down through generations of Australians and is now considered a staple of traditional Australian cuisine. People love this recipe because it connects them to their heritage and reminds them of the resilience and resourcefulness of their ancestors.
2. Easy to Make: Another reason people love the Australian Damper Bread recipe is that it is incredibly simple to make. With just a few basic ingredients, including flour, salt, and water, anyone can create a delicious, hearty bread in a matter of minutes. This recipe requires no yeast or fancy equipment, making it accessible to even the most novice of bakers. People appreciate the simplicity of this recipe and enjoy the sense of accomplishment that comes with making something from scratch.
3. Comfort Food: There is something incredibly comforting about bread, and the Australian Damper Bread recipe is no exception. Its warm, filling, and rustic qualities make it the perfect comfort food for a chilly winter evening or a lazy weekend brunch. People love the way this bread makes them feel, both physically and emotionally. It is a reminder of home, of simpler times, and of the importance of taking pleasure in the little things in life.

How To Make Our Australian Damper Bread Recipe
Ingredients (8 Servings)
3 cups self-raising flour
1 teaspoon salt
1 cup water
Instructions
1. Preheat your oven to 200°C (390°F).
2. In a large bowl, mix the flour and salt together.
3. Slowly add the water to the bowl while stirring with a wooden spoon until a dough forms.
4. Turn the dough out onto a floured surface and knead for a few minutes until it becomes smooth.
5. Shape the dough into a round loaf and place it onto a greased baking tray.
6. Use a sharp knife to make a deep cross in the top of the loaf.
7. Bake in the preheated oven for 30-40 minutes or until the loaf is golden brown and sounds hollow when tapped on the bottom.
8. Remove the loaf from the oven and allow it to cool for a few minutes before serving.
Nutritional Information For the Australian Damper Bread Recipe
Calories: 200
Carbohydrates: 41g
Protein: 6g
Fat: 1g
Saturated Fat: 0g
Cholesterol: 0mg
Sodium: 390mg
Potassium: 60mg
Fiber: 1g
Sugar: 0g
Prep Time: 5 minutes
Cooking Time: 30-40 minutes
Pots, Pans, and Cooking Equipment Needed for the Australian Damper Bread Recipe
Large mixing bowl
Wooden spoon
Baking tray
Oven
Best Way to Store Leftovers From the Australian Damper Bread Recipe
To store leftovers, wrap the damper bread tightly in plastic wrap or aluminum foil and keep it at room temperature for up to 2 days. For longer storage, place the wrapped bread in an airtight container or ziplock bag and store it in the freezer for up to 3 months.
Substitutions For the Australian Damper Bread Recipe
Self-raising flour: If you don’t have self-raising flour, you can make your own by adding 1 1/2 teaspoons of baking powder and 1/2 teaspoon of salt to 1 cup of all-purpose flour.
Salt: You can adjust the amount of salt to suit your taste preferences.
Water: You can substitute milk or buttermilk for the water to make the bread richer and more flavorful.
Substitutions For the Vegetarian Australian Damper Bread Recipe
The Australian Damper Bread recipe is already vegetarian, so no substitutions are needed.
Tips and Tricks For Easier Creation
Use a sharp knife to make the cross in the top of the loaf, as this will help the bread rise and cook evenly.
If you prefer a softer crust, wrap the bread in a clean kitchen towel while it cools.
You can add herbs, cheese, or other flavorings to the dough before baking to give the bread a different flavor profile.
Side Dishes and Desserts For the Australian Damper Bread Recipe
The Australian Damper Bread is a versatile dish that can be served with a variety of sides, including:
Soup or stew
Grilled or roasted meats
Fresh salad or vegetables
Cheese and charcuterie platter
How To Serve the Australian Damper Bread Recipe
To serve, cut the damper bread into thick slices and serve it warm with your choice of butter, jam, or honey. You can also use it as a base for sandwiches or toast it and serve it with dips or spreads.
FAQs About the Australian Damper Bread Recipe
What is the history of Australian damper bread recipe?
Australian Damper Bread has its origins in the colonial era of Australia. It was originally made by travelers such as swagmen and drovers who needed a simple and filling bread that could be cooked over a campfire. Today, it is considered a staple of traditional Australian cuisine and is enjoyed by people all over the world.
What are the basic ingredients needed to make the Australian damper bread recipe?
The basic ingredients needed to make Australian Damper Bread are self-raising flour, salt, and water. However, you can also customize the bread by adding herbs, cheese, or other flavorings to the dough.
Can the Australian damper bread recipe be made without an oven?
Yes, Australian Damper Bread can be cooked over a campfire or in a Dutch oven. Simply shape the dough into a round loaf, wrap it in foil, and place it directly on the hot coals or in the Dutch oven. Cook for 30-40 minutes or until the loaf is golden brown and sounds hollow when tapped on the bottom.
How long does Australian damper bread last?
Australian Damper Bread can be stored at room temperature for up to 2 days. For longer storage, wrap the bread tightly in plastic wrap or aluminum foil and store it in an airtight container or ziplock bag in the freezer for up to 3 months.
What are some common variations of Australian damper bread?
Common variations of Australian Damper Bread include adding cheese, herbs, or even dried fruit to the dough. Some people also cook the bread over a campfire for a smoky, charred taste. The bread can be served as a side dish, used to sop up gravy or sauce, or even turned into a sandwich. Its versatility means that there are endless possibilities for customizing the recipe to suit your taste preferences.
Final Thoughts
I just made the Australian damper bread recipe for the first time, and I have to admit that it is one of my new favorite types of bread. The recipe’s historical relevance and status as a mainstay of Australian cuisine originally piqued my interest. But I was pleasantly pleased by how simple and wonderful this bread is.
One of my favorite things about the Australian Damper Bread recipe is how adaptable it is. Self-raising flour, salt, and water are the only ingredients needed for the basic recipe. But, you can simply make the bread your own by adding herbs, cheese, or other seasonings to the dough. I tried many combinations, and my favorite was cheddar cheese and chopped rosemary. The end product was a delicious bread that was ideal for dunking into a hearty stew or soup.
The simplicity of this dish is another quality I value. A few simple ingredients and some gentle kneading allowed me to produce a perfectly round loaf that might have passed for store-bought. Making anything from scratch gives me a wonderful feeling of achievement, and this bread is no exception.
Of course, the greatest part of baking a Australian damper bread recipe is getting to taste it. The bread has a warm, comforting taste that is ideal for the colder months and a robust, somewhat chewy texture. It is great when served warm with butter, but it is also great when toasted and spread with jam or honey.
Overall, I would strongly advise trying the Australian damper bread recipe. It can be used for almost anything and is tasty no matter how you prepare it. This dish is certainly worth a try whether you’re trying to reconnect with your Aussie roots or just want to try something different in the kitchen.
Australian Damper Bread
Equipment
- Large mixing bowl
- wooden spoon
- Baking tray
Ingredients
- 3 cups self-rising flour
- 1 tsp salt
- 1 cup water
Instructions
- Preheat your oven to 390°F(200°C).
- In a large bowl, mix the flour and salt together.
- Slowly add the water to the bowl while stirring with a wooden spoon until a dough forms.
- Turn the dough out onto a floured surface and knead for a few minutes until it becomes smooth.
- Shape the dough into a round loaf and place it onto a greased baking tray.
- Use a sharp knife to make a deep cross in the top of the loaf. (to let the devil out when baking)
- Bake in the preheated oven for 30-40 minutes or until the loaf is golden brown and sounds hollow when tapped on the bottom.
- Remove the loaf from the oven and allow it to cool for a few minutes before serving.
Notes
Tips and Tricks
Use a sharp knife to make the cross in the top of the loaf, as this will help the bread rise and cook evenly. If you prefer a softer crust, wrap the bread in a clean kitchen towel while it cools. You can add herbs, cheese, or other flavorings to the dough before baking to give the bread a different flavor profile.
You May Want to Join Our Boondocking Group on Facebook For More Information
You May Want to Join Our Campfire Recipes Group on Facebook For More Information
For More Photos Visit Our Instagram at World Recipes Daily – Our Big Escape